Monday, October 26, 2009

This is one of my absolute favorite blogs for getting ideas to do with the girls.
I never have time to hardly any of them, but someday!

http://www.frugalfamilyfunblog.com

Go look at it, and then make some neat snack cups!

Canning Ring Pumpkins

I can't remember where I found this, I'll have to be more careful next time. But, my girls had a lot of fun with this outdoor fall game. First, take a pumpkin with a nice stem still attached, we used a big one and mini pumpkins. Then take some canning rings. Put them together and what do you get? A fun tossing game. Laura did ok, the wide mouth rings work a little better than the small ones, but Eden still had fun putting them on the stems. Ryan tried to eat the rings and the bark from the tree. I also want to try making some rings a little bigger out of cardboard cereal boxes.

After they get bored with this game, tie some ribbons onto the edges and let them run around with the ring in their hand and their ribbon kite behind them.

Wednesday, October 14, 2009

Soft Play Dough

I know there are a MILLION recipes out there for play doughs, but this is the one I tried today (thanks to Google). It turned out quite nice! It is soft and it doesn't dry your hands out like salt dough. I really like using the baby oil instead of cooking oil. It smells good and should last longer without going rancid. I split it into 6 balls, each a bit larger than a store bought PlayDoh can, and made them each a different color. Plenty for a few kids to share.

The original recipe said to microwave for 4-5 minutes and then 1 min increments, but it was soooo long that it *cooked* mine too much. I had to throw out the edges since they were hard. I've reduced the times below, so let me know how it turns out for you!

PERFECT PLAY DOUGH

2 cups flour
1 cups salt
2 cups water
2 tablespoons baby oil ( works better than regular oil)
2 tablespoons cream of tarter
liquid food coloring

Combine dry ingredients. Add water and oil. Stir well. Microwave on high 2 minutes. Stir again. Microwave another 30 seconds. Stir. Continue to microwave for 30 second increments, stirring between, until dough is the consistency of mashed potatoes. Cool it enough to touch. Knead in food coloring until dough is desired color. Store in an air-tight container or ziploc bag.

Monday, August 10, 2009

On the Go Finger Painting

For the fun of finger painting without the mess, simply squirt some paint in a sturdy Ziploc bag and seal it tight. Lay it on a flat surface and let your kids draw pictures in the paint through the bag. You just need to make sure your kids are either too young to open the bag or old enough to know not to do it!

Water Painting

This is simply a variation on Abby's previous post about the spray bottles. Sydney doesn't know how to use one yet, so I gave her some paint brushes and a bucket of water and let her go to town on the patio, the rocks, the ants, etc. while I get some yard work done. She loves it, there is absolutely no mess to clean up since the water just evaporates, and I get to hear her running around yelling, "I paintin'!"

Friday, August 7, 2009

Homemade Play Dough

Here is a recipe for homemade playdough. If your "wee" ones are anything like mine, this is great because it's edible. I don't encourage her to eat it, I just know she will.

Ingredients:
1 c. flour
2 tsp cream of tartar
1/4 c. salt
1 Tbl vegetable oil
1 c. water

Directions:
Combine ingredients in saucepan and mix well. Stir over low heat for about 5 mintes. When mixture forms a ball, remove from heat. Turn onto cookie sheet and cool. When cool enough to handle, add food coloring and knead until smooth. Store in airtight plastic container.

Notes:
I have not tried this recipe personally, so if anyone finds a problem with it or has a good trusted one (I know some get really liquidy quickly), let me know!

Friday, July 31, 2009

What's better than water?


This idea has saved me when I just need a few minutes. To finish dinner, make a phone call, or just eat a candybar in peace. Cheap, dollar store spray bottles. Fill 'em up with water, hand one to each of the kids and send them into the back yard. They spray the sidewalk, their bikes, each other, and love it.

Another one for kids is to put them in an empty bathtub with a pile of shaving creme and some kid paint brushes. Make sure they don't have clothes on that can't get stained though. After they paint everything, including themselves, let 'em wash it back off with a bucket of water. This will keep my girls entertained for honestly an hour and a half. It's how I pack for trips!

Thursday, July 30, 2009

Cute Kid's Craft E-Book for Free!

I've just scanned through this, but it looked promising. Most of the crafts look a bit more advanced than I like to take on with my kids, but there is a recipe for silly putty and how to recycle old crayon bits.

I swiped the idea from the Utah Deal Diva, which is a great coupon/thrifty site I follow.

There's a 50-page downloadable Kid's craft guide available here. Enter your "junk" email address and click "Skip Other Offers" and you'll receive a cute guide filled with tons of neat projects for kids!

Wednesday, July 29, 2009

Quiet Activity

+

=

A Great Church Activity!

Ella can't dump them, they don't come out as easily as they go in! I hold a handful and she has a great time popping them into the perfect sized hole. Best part is the whole activity is completely silent (well not always. . .)

Monday, July 27, 2009

Nature Bracelets

Most kids love being outside, and toddlers are fascinated by everything around them, which is very refreshing. I like being reminded that ants and rocks are amazing. To help your budding naturalist, let him or her make a nature bracelet.

ITEMS NEEDED
Clear packing tape
Scissors

INSTRUCTIONS:
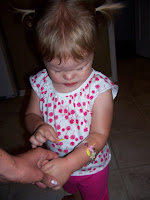
Cut a piece of packing tape long enough to go around your child's wrist and overlap the ends with the sticky side of the tape up. While playing outside or on a walk, encourage your child to find differently shaped leaves, flower petals, grass blades, and more and stick them on his or her tape bracelet. When you are done, cover the bracelet with another piece of packing tape, sealing those natural treasures inside. Cut off of your child and let them use it as a bookmark or anything else their little heart desires.

Saturday, July 18, 2009

Bubble Bottle (The Foamerator!)

Like most kids, Sydney loves bubbles, but she also loves to hold them and pop them and is a little sad when they all blow away or pop before she can touch them. That makes this her new favorite toy.

ITEMS NEEDED:
Scissors
Plastic water bottle
Used towel
Rubber band
Shallow bowl
Dish soap

INSTRUCTIONS
1. Cut the bottom off a plastic water bottle.

2. Cover the open end with a circular piece of towel that's a few inches wider than the bottle. I just used an old washcloth without cutting it, but this way would be less bulky). Secure the towel with a rubber band.

3. Dampen the towel with water, then dip it into a shallow bowl of dish soap. Blow gently through the mouth of the bottle to create snakes of tiny bubbles.

NOTES
If you notice fewer bubbles are coming out after a bit, spray a little more water on the washcloth and you'll be swimming in bubbles in no time!